Winter Soup

Hello,

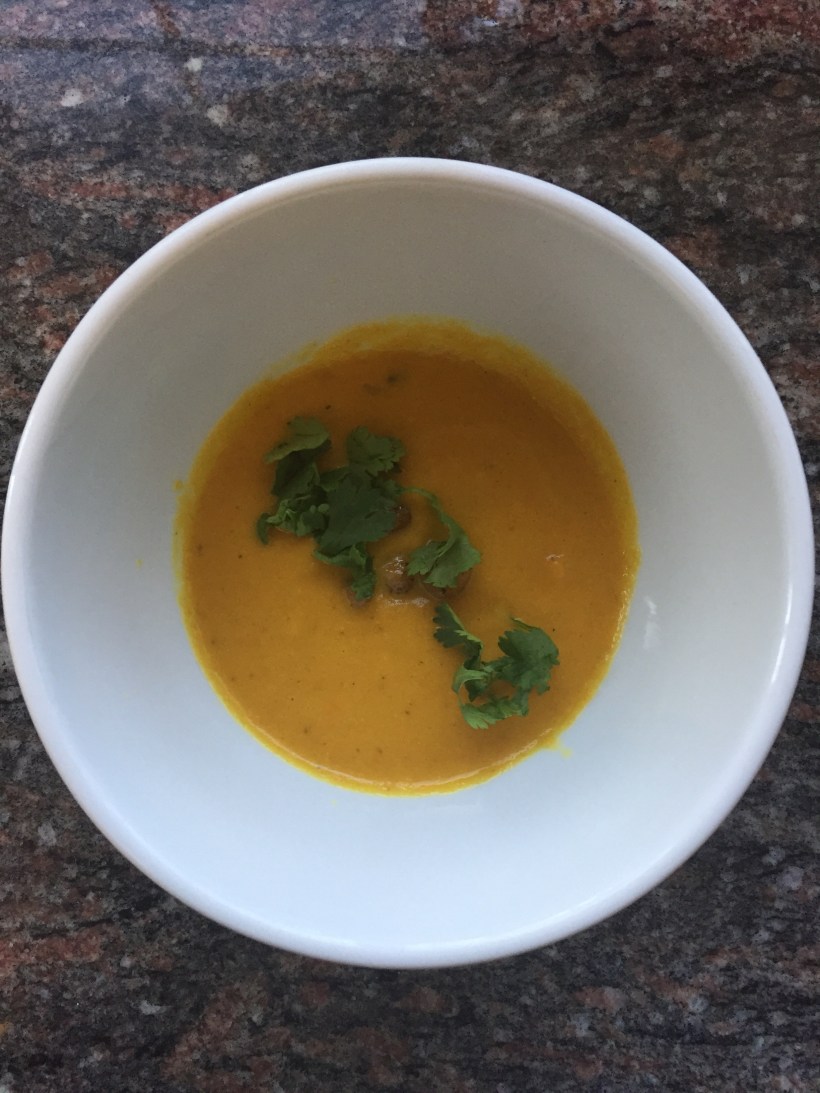
It is starting to feel like winter! Whenever it is gray and cold outside, I feel like making (and eating!) soup. I wanted to make a coconut curry soup this week but ran out of coconut milk and didn’t feel like running out to get some. I put this together with the stuff I had in my fridge/pantry and I think that it is versatile enough that you can use whatever you have on hand. We ate the soup with crunchy garbanzo croutons and pesto grilled cheese sandwiches (recipe for the garbanzos below as well!). I hope that it hits the spot for you like it did for us!

Winter Soup

Ingredients:

1 small head of cauliflower

2 large or 4 small carrots (about 2 cups chopped)

1 small onion

vegetable bullion (2 cubes)

water

1 clove of garlic, 1 knob of ginger

Assorted spices: cumin, turmeric, salt, pepper, curry powder or curry paste, thyme, etc..

ghee or butter

splash of milk (almond milk or non-dairy milk will work, as will coconut, or cream if you want to use that)

garbanzo croutons (see below)

Instructions:

  1. Salute the chopped onion, garlic and ginger in 2 tablespoons of the butter or ghee.
  2. Add in spices: salt and pepper, cumin, curry paste etc. Stir and cook for about a minute until the spices are fragrant.
  3. Add in the chopped vegetables and cook for 2-3 minutes until they start to soften.
  4. Add in 3 cups of water and stir, scraping the bits of the bottom. Put in the bullion cubes. Cover and cook for 15-20 minutes until the vegetables are soft.
  5. Using a hand blender (or a regular blender in batches), puree until smooth.
  6. Stir in 1 cup of “cream” (milk or coconut milk work well)
  7. Top with toasted pepitas, chopped herbs and garbanzo croutons.
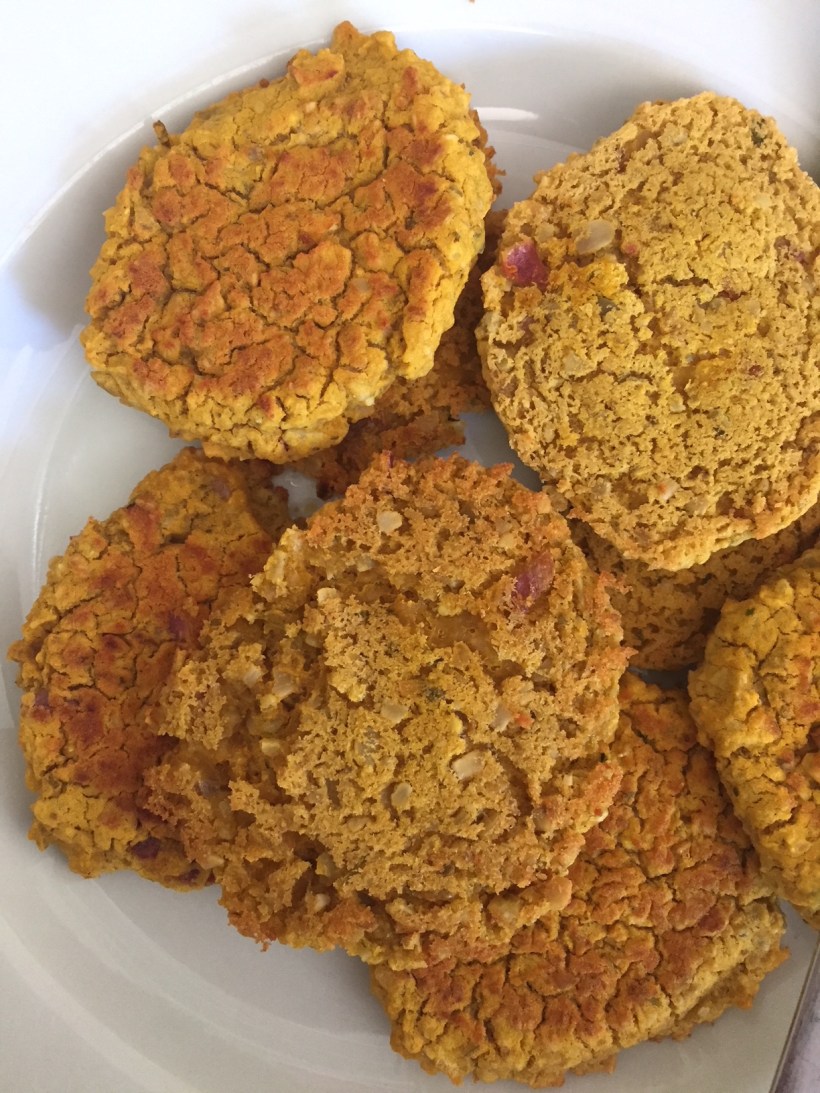
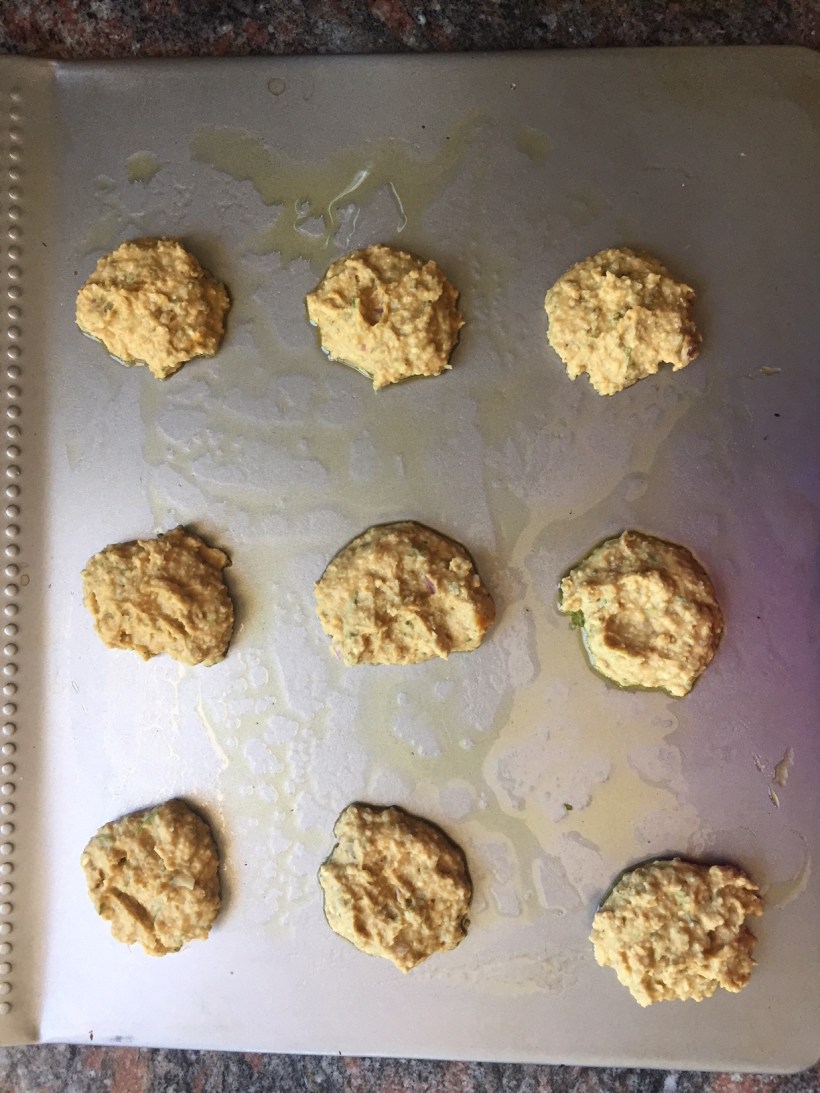
Garbanzo Croutons

Ingredients:

One can of garbanzo beans, drained and rinsed

salt,  cumin

olive oil

Instructions: 

  1. Preheat the oven to 300 degrees.
  2. Toss the garbanzo beans with 1 tablespoon olive oil, 3/4 tsp salt and 1/2 tsp cumin
  3. spread out on a baking sheet and toast for 30 minutes until crispy, stirring once 15 minutes into the cooking time.
  4. Serve!

Pumpkin Lentil Falafel

Happy Wednesday everyone!

It’s been a whirlwind the last week! We just celebrated Diwali (a Hindu festival which celebrates the triumph of good over evil or light over dark). It’s one of my favorite holidays of the year and we were so happy this year to celebrate with my nephew as well. I am always the happiest when the kids are together.IMG_2082


This year, after celebrating with so many who are dear to me, I reflected on how we have been blessed to develop a diverse community/village. #lifegoals

I am going to tell you about these delicious and relatively quick fall falafel patties I made. But first some link love!

A couple of books that I am reading:

  1. A recommendation from the girls’ head of school called “Wait, What?”  It’s a quick read and super interesting.


2. I know I am late to the game, but my sister just gave me her copy of Rupi Kaur’s Milk and Honey and it’s pretty incredible. One of my favorite poems here:

Image result for rupi kaur if you were born with the weakness


Other fun stuff:

1. Ten of the best photos from the 2017 National Geographic Travel Photos contest. Cheers me up every time:

https://www.boredpanda.com/national-geographic-travel-nature-photographer-of-the-year-contest-2017/

2. My friend Nadya sent out this awesome video for the International Day of the Girl:


3. On my list to make:

https://cookieandkate.com/2017/mini-peanut-butter-cups-recipe/

and

http://www.acozykitchen.com/burnt-butter-pear-apple-crumble/

Now, on to the recipe. I saw this a couple of weeks ago on Ashley’s blog Blissful Basil and bookmarked it to make. I love the idea of incorporating pumpkin into these to make them good for the fall! And since it uses such little pumpkin, there is pumpkin puree left over to make a fall dessert. These patties are also gluten-free and vegan. I ate mine with tahini sauce (i’ll give you the quick recipe below) and some greek yogurt on the side. They would also be good like more traditional falafels – wrapped in pita. I did make a few tweaks to the recipe, so if you want the original, you can go to Ashley’s site.

Pumpkin Lentil Falafel

Ingredients:

  • 1 cup dried split red lentils
  • 2 cups water
  • 3/4 cup mix of raw sunflower and pumpkin seeds
  • 1/2 cup canned unsweetened pumpkin purée
  • 3/4 cup oat flour (make your own by blending oats in a food processor)
  • 1/4 cup cilantro leaves, stemmed
  • 1/2 medium red onion, roughly diced (about 1 cup)
  • clove garlic, peeled and roughly chopped
  • 1 1/2 tablespoons fresh lemon juice
  • 1 1/2 teaspoons ground coriander
  • 1 1/2 teaspoons ground cumin
  • 1 1/2 teaspoons smoked paprika
  • 1 1/2 teaspoon sea salt or to taste

Instructions:

  1. Preheat the oven to 350F and generously oil 2 baking sheets.

  2. In a medium saucepan, combine the lentils and water, and bring to a boil. Reduce the heat and simmer for 8 to 10 minutes, or until the lentils are tender but not yet mushy. Strain off excess water and set aside.

  3. Add the seeds to a food processor and process for one minute, or until ground into a coarse flour.

  4. Then, add the cooked lentils, pumpkin purée, and all remaining ingredients to the food processor. Pulse 10 to 15 times to coarsely chop and mix. Be careful not to over-process.

  5. Using a large tablespoon, drop spoonfuls of the batter on to the baking sheets, flatten slightly using the back of the spoon.

  6. Bake for 10 minutes on each side, longer if you like them crispier (but be aware, that if you overtake them, they will dry out)

  7. Let the patties cool on the pan slightly before moving or serving.

    8. Serve with tahini sauce!

    IMG_2140

    IMG_2142

    Quick Tahini Sauce

    In a small blender (or can be mixed by hand) combine a few scoops of sesame tahini, a splash of olive oil, a splash of water, juice of one lemon, and salt/pepper to taste. Blend until it becomes a smooth paste. Serve with the falafel!


    Love,

Pooja


The Little Things

Sometimes it’s the little things. We have so many big things going on right now: school, moving to temporary digs until our house is ready for us to move into (2 weeks!), saying goodbye to our beautiful old house. But, you know, I was ready for all of this. I prepared. I have my super-strong husband by my side and we are having an adventure doing all of this. The kids are rolling with it. Even the baby is not too worried about any of it – just perplexed that “everything” is gone from the house and is living in a truck somewhere.

I was even getting confident: all of this is going fine, we are all doing fine, it’s only a couple of weeks. Then, we got to karate last night and Diya’s glasses got lost. Now, we are usually somewhat prepared for these unforeseen disasters, but this time, we were woefully unprepared. She needs them to see. We don’t have a backup pair. Her contacts are packed (in the truck remember?). She and I panicked. Turns out somehow another boy ended up with them in his bag – the whole thing was pretty strange. She had a hunch he had them, but he would not look in his bag or let her look. As we were about to give up (20 minutes after searching everywhere in the studio), his father pulled up and the boy got out and gave me the glasses. Now, I can say that although I was relieved, I was also upset. We ended up exchanging some words, with his father thinking me ungrateful and me thinking them inconsiderate to have put us through that in the first place. I am not proud of that interaction. Today, I will reach out and apologize for my part in that.

But, the thing is, I didn’t have anything left. I couldn’t take ONE MORE THING. So, what did I learn? That I should let go of my guilt over this incident and just apologize. That being prepared also means taking care of myself (which clearly I was not doing). That we all make mistakes – and I need to forgive that dad and forgive myself.

So, after all this craziness, I re-centered. I listened to Nisa singing “work work Angelica, work work Eliza” (I mean, what is cuter than a baby singing Hamilton?). I shared in Diya’s monumental relief that her glasses were found. I listened to Esha tell me about the math game that they played at school. I appreciated my husband saying, “I understand, I am sorry to you had to go through that.” Time to start anew.

5W7A9148-SM-1080x714

The last thing I baked in our house was a gluten-free, orange ginger dark chocolate bread. It was  delicious, and a good transition into early fall flavors – the ginger offset the orange and chocolate flavors beautifully.

The picture is from the Emma, the author of the recipe. The recipe is here: http://www.mydarlinglemonthyme.com/2017/08/flourless-dark-chocolate-orange-ginger-muffins.html

The original recipe made muffins – but to be simpler, I made it into a loaf. I do think that this required a longer baking time. Please let me know if you make it. I am sorry no pictures, but to be honest, it’s not very pretty! But is is delicious.

Love,

Pooja

Weekend Breakfast: Chilaquiles

Hello everyone!

Once in a while on the weekend, we feel like having a fancier breakfast. My kids don’t generally like eggs so I always end up making pancakes for them and eggs for us. This recipe is great because it’s not very egg-y tasting, so that even Diya (who has never ever eaten an omelette) will eat this.

It comes together relatively quickly for something that looks like much more work. This is my version of it that I came up with while experimenting one morning. We use the Casa Sanchez thick chips to give a bit more bite. You can use any toppings that you like, but our favorites are cilantro, avocado, and a sprinkling of cheese.

Chilaquiles

(this serves 2 people as a main or 4-5 people as a side)

IMG_1995

Ingredients:

one pint cherry tomatoes

1/2 bag (or more) of tortilla chips

salt/pepper to taste

olive oil

taco seasoning (or cumin and paprika)

4 eggs

toppings: queso fresco (I used feta), cilantro chopped, sour cream, avocado (chopped or sliced), anything else that sounds good!

IMG_1994

Methods:

  1. Heat 3 tablespoons of olive oil in a cast iron skillet until shimmering. Add the cherry tomatoes (sliced in half lengthwise)
  2. Cook, stirring occasionally, until softened. Add taco seasoning and salt/pepper to taste.
  3. Beat the eggs with 1/4-1/2 tsp salt. I used one egg and three egg whites (I am not a huge fan of the taste of the yolk).
  4. Place a large handful or two of the tortilla chips into the tomato mixture, digging them into the mixture a bit.
  5. Pour the eggs over the chip/tomato mixture and cook for a minute, then turn the chips over in sections and continue to cook. Continue this process until the eggs are set and coating most of the chips.
  6. Take off the stove and add desired toppings. Serve immediately. Enjoy!


IMG_1988IMG_1989IMG_1990IMG_1992IMG_1991IMG_1993


Love,

Pooja


Peanut Butter and Jelly Cookies

Hello Friends! We are talking again so soon! I think that I inspired a new obsession in my daughter – she is baking again already! She decided to make these cookies – really driven by her craving for something sweet AND her love of PB&J.

Diya is officially a tween, and one of the things that I love about this age is the intensity of  things. She LOVES her music and listens to it loud. And when she craves something sweet, she will even make it herself so she can eat it! This is a complicated time in life and we try to use moments that we are together, here and there, to talk about life and ideas. The quote that I saw and loved today is one that Esha’s favorite teacher posted (thank you Jess!):

Image may contain: text

This one is super valuable for all of us, I think.

The cookies are supposed to be for breakfast because they have lots of good-for-you ingredients: coconut oil, almond flour, oats. They are naturally gluten-free and dairy-free. We made some adjustments as the original recipe calls for a banana. She was not a big fan of having these be banana-y so we swapped out the banana for a splash of milk and a tablespoon of olive oil.  We also used homemade chia jam for the centers.

We are posting the original recipe below. Feel free to use our tips/tricks above for swaps.

PB&J Cookies

Ingredients:

2 cups old-fashioned rolled oats

1 cup almond flour

1/4 cup  sugar

½ teaspoon baking soda

1/2 teaspoon baking powder

1/4 teaspoon cinnamon

1/4 teaspoon salt

1 large banana, mashed

¾ cup creamy peanut butter, melted

2 tablespoons coconut oil, melted

2/3 to 3/4 cup jam

Methods:

  1. Preheat the oven to 350 degrees and line a baking sheet with parchment paper (or a silpat baking mat).
  2. Put the peanut butter and coconut oil in a bowl and melt in the microwave for 30 seconds until it’s nice and melted. Let cool for a few minutes.
  3. In a large bowl, mix oats, almond flour, sugar, baking soda, salt, and cinnamon.
  4. Add the coconut oil/peanut butter mixture to the dry ingredients. Mix well.
  5. We used our hands to form the dough into a round shape, press down a thumbhole into the middle to make a space for the jam. Spoon a half-teaspoon of jam into the center of the cookie.
  6. Bake for 12-15 minutes until golden brown.


They are delicious – she is planning to eat them for lunch with yogurt on the side. A complete meal for a tween!


IMG_1913-1

Peanut Butter Chocolate Chip Cookies

We are ready and gearing up for the summer! I am hoping that the kids get a lot of time outside and at least some time being bored. We are trying to figure out a plan for the summer so they don’t lose some of their skills (the summer backslide I think it is called). I don’t want them to spend the time doing workbooks and so we are working together to come up with some things they can learn that will be inspiring and fun.

These are some of the things we have come up with so far:

  1. This list of the 100 books everyone should read. We are going to pick some that are appropriate for their ages. Esha wants to read A Wrinkle in Time and Little Women. Diya is going to start with To Kill a Mockingbird: https://www.goodreads.com/shelf/show/100-books-everyone-should-read
  2. This list of Ted talks: https://www.ted.com/playlists/163/7_talks_to_make_you_love_scien
  3. Khan academy has videos on world history and religion, timely in light of what is going on in the world: https://www.khanacademy.org/humanities/world-history
  4. Hindi classes – taught at home, by me, once a week. Hardest to stick to in terms of schedule – but worthwhile.
  5. Out-loud math: Esha is going to practice counting forward and backward by 4, 6, 7, 8 etc.

Let me know if you have other ideas!

This week I made cookies. They were pretty delicious. I heard about them from Lindsay of Pinch of Yum and they are from the LoveRealFood cookbook (link: https://www.amazon.com/Love-Real-Food-Feel-Good-Vegetarian/dp/1623367417/ref=as_li_ss_tl?ie=UTF8&qid=1496280551&sr=8-1&keywords=love+real+food&linkCode=sl1&tag=recipepost-20&linkId=b94d95f58ca4a66d3ab1e36c2f07e4cf), They were super simple and definitely the best PB cookies I have had. Give them a try, you won’t be disappointed!

I did start craving chocolate and peanut butter while I was making them so I made a quick snack to get me through. Trader Joe’s dark chocolate with a swipe of PB:


Peanut Butter Chocolate Chip Cookies

Ingredients: 

16 ounces peanut butter

1/2 teaspoon vanilla

1/4 teaspoon salt

2 eggs

1 cup chocolate chips

1 cup brown sugar (I reduced this from the originally suggested 1.5 cups)

Instructions: 

  1. Preheat over to 350 degrees.
  2. Mix sugar and eggs until smooth in a medium bowl using a sturdy spoon. IMG_1663

2. Add in vanilla and salt. Stir.

3. Add in peanut butter and mix until well incorporated. IMG_1664

4. Add in chocolate chips and stir well. IMG_1668

5. Chill the dough for at least 15 minutes (I chilled for 30 minutes).

6. Use a cookie scoop (I am not that fancy, I used two spoons) to scoop out dough onto a silpat baking mat on a cookie sheet (can also use parchment paper on a cookie sheet). img_1669.jpg

7. Bake for 10-11 min until the edges are golden brown. Let sit on the baking sheet for two-three minutes at room temperature, then you can transfer them to a cooling rack.

8. Enjoy! Diya certainly did! Can you tell that she was celebrating ‘architectural hair day’ at school?IMG_1670

Vegetable Satay Noodles

Good evening! Hope that you all are having a wonderful start to your summer! We had a jam-packed day today that ended with the girls passing their Karate tests and becoming yellow belts while the baby cheered them on. It felt like a good and big first step in their martial arts journey.

I just turned 40 which feels surreal – I think mostly because it feels like my 20s didn’t really happen since I was in school and residency for most of them. Still as everyone tells me – 40 is the new 30! I am trying to figure out how to celebrate for myself and I think that the answer is going to be a haircut – something different maybe – but we will see. There has already been a lot of change in my life over the last year and I am not sure that I am ready for another big one – even if it is as simple as a haircut!

These satay noodles were a recent weeknight dinner – I had a lot of veggies and was trying to think of something to make that would be colorful and still fresh tasting. This really hit the spot – my kids said it was a do-over…

Ingredients: 

For the sauce:

1/2 tsp honey

2 tablespoons tahini

2 tablespoons peanut butter (smooth)

Splash of rice wine vinegar

1 tablespoon coconut oil or olive oil

1/4 tsp ginger powder

1 can coconut milk

salt/pepper to taste

The noodles:

3-4 cups assorted vegetables (I used broccoli, red pepper and carrots)

16 ounces noodles (can use soba, buckwheat, etc. I used edamame noodles)

olive oil

garlic (1 clove, chopped)

chopped cilantro, chopped peanuts, toasted coconut, toasted pumpkin seeds (optional)

Instructions: 

  1. First prepare the noodles. When cooked, rinse with cool water and set aside. Reserve some of the cooking water in case needed to thin the sauce.
  2. In a deep frying pan, cook the garlic on low heat in 1 tablespoon of the oil, taking care not to burn the garlic.
  3. Add the hardest vegetable first (carrot for me) and 1 tsp water. Cover and cook for 3-5 minutes until bright. Continue with the other vegetables, until all are cooked through. I did not cover and cook when I added the pepper and the broccoli. I just added the pepper first, cooked for 2 minutes, then added the broccoli and cooked for an additional 3-5 minutes.
  4. In a medium bowl, whisk together the sauce ingredients, saving the coconut milk for last. The mixture should be smooth. If it is too thick, add some of the past water, a couple of tablespoons at a time, until it is thin enough to toss with the noddles.
  5. In a large bowl, mix together the noodles, sauce and vegetables. Top with the optional toppings – I used cilantro and toasted pumpkin seeds for ours.
  6. Enjoy!


Love,

Pooja


Infinitely Adaptable Granola

Good morning!

It’s been a busy couple of weeks so I haven’t had the chance to write. I wanted to share this great blog that I found that talks about parenting and raising girls to be confident and leaders. It’s by this woman named Laura Clydesdale and she has some great articles with references and links. Let me know what you think! As we enter into the tween years with my oldest, I can use any good advice I can get about raising strong girls in the face of all that is going on in the world. The best of times in some ways and the worst of times in some ways for being a young lady.

Here is one that I thought was important: http://www.lauraclydesdale.com/blog-native/how-to-easily-build-your-self-confidence-self-esteem-face-stressful-situations/

Today I want to share our favorite granola recipe. I found this recipe from Alton Brown about 5 years ago and we love it so much that we have some in our pantry almost all of the time. I usually make it on a weekend evening when we are hanging out at home, so I can go and stir it as often as needed.

I use this recipe so much, I wrote it in my recipe book and you can see the stains from the honey!

IMG_1347

So there you have it! Including the recipe below in print so it’s easier to read!

Ingredients: 

3 cups oats

2 cups of nuts (chopped) and/or seeds – you can use whatever combination you like

3/4 cup shredded coconut (I use unsweetened most of the time)

1/4 cup plus 2 tablespoons brown sugar (can easily omit the extra 2 tablespoons if you want a lower sugar recipe)

1/4 cup plus 2 tablespoons honey (maple syrup also works)

1/4 cup oil

1/2 teaspoon salt

1 cup dried fruit (blueberries, cherries, apricots chopped, raisins, or a mix of any)

Optional: 1/2 teaspoon cinnamon or nutmeg

Instructions: 

  1. Preheat the oven to 250 degrees.
  2. Combine all of the dry ingredients except the fruit in a large bowl.
  3. Pour the oil into the mixture and then use the same 1/4 cup to measure the honey. That way the honey will come out of the cup easily. The measurement for the honey is 1/4 cup plus another half of that (4 tablespoons = 1/4 cup).
  4. Mix well and spread on a baking sheet.
  5. Put in the middle rack in the oven. Stir every 15 minutes until it reaches the desired doneness. Mine usually takes 45 minutes.
  6. Enjoy! I eat mine with almond milk or yogurt. This version that I made has pumpkin seeds, pecan, hazelnuts, chia seeds, cinnamon and honey. I didn’t add in any fruit to this version.

Uncooked —> Toasty!


Love,

Pooja

Pan-Fried Brussels Sprouts

Dear Readers,


We have all been battling colds for the last few days – I am hoping that it is the last one of the season. Things have otherwise been busy as well – we are planning a short trip to NYC next week, just the older girls and me. We are really excited to explore together! They are such fun ages for a trip like this and we have been plotting our itinerary for a couple of weeks. Fingers crossed that the weather stays nice.

I will be co-hosting a conference with my friend Dr. Nwando Olayiwola. She is incredible – a true inspiration. She has written a book about how to succeed as a Minority Woman Professional (MWP) and it is spot on – tips that come straight from her experiences and are explained with heart. She has a list of ten ingredients that are essential. One of the ingredients is “Bring Others Up”. I loved reading this part of the book because this is something that I see Nwando live in her everyday life: she is always looking for an opportunity to elevate others.

The conference is one in a series that has been created to help MWPs “survive and thrive”.

If you are interested in learning more, you can find the book here: https://www.amazon.com/Minority-Women-Professionals-MWPs-MVPs/dp/0692720448/ref=sr_1_2?ie=UTF8&qid=1490328277&sr=8-2&keywords=olayiwola

For more information about the conference: https://inspire-health-solutions-llc.myshopify.com/pages/conference-information

Today for dinner, I made a simple pasta with spring vegetables. The brussels sprouts were a side – to get more veggies in. Brussels sprouts can be a bit bitter and I find that this method of cooking really brings out the flavor and gets rid of the bitterness because it allows for them to cook through. The red bell pepper provides a nice contrast in terms of color and flavor.

IMG_1236

Ingredients: 

1 pound brussels sprouts (or 20-30)

1/2 red bell pepper (optional)

2 tablespoons olive oil

1 teaspoon water

1 tablespoon butter

salt and pepper to taste

Instructions: 

  1. Slice the brussels sprouts very thin (I get about 6-8 slices per sprout) – alternatively you can use a mandolin but I get nervous about slicing my finger off. Dice the bell pepper.
  2. Heat the olive oil until shimmering in a cast iron or nonstick skillet. Add the brussels sprouts and stir well to coat. Season with salt.
  3. Add the teaspoon of water and cook, covered, for about 1 min. When you remove the cover, the sprouts should be bright green in color.
  4. Sprinkle a generous amount of black pepper and stir. Add in the bell pepper if using. Cook uncovered, stirring frequently, until the sprouts start to brown and get a little crispy around the edges (2-4 minutes).
  5. Add in the butter, stir until coating the sprouts. Cook for another minute to incorporate the flavors. Sprinkle additional salt as needed.
  6. Enjoy!


Gluten Free Cookies: Two Ways

Dear Readers,

Happy International Women’s Day! Today I am especially thankful for a group of women that I have in my life, my Book Club Ladies. When I joined this book club a few years ago, I had no idea that these women would change my life. Each and every one of these women is incredible: kind, loving, amazing mothers and friends. Once a month we get together to discuss a book and have a delicious dinner and share our lives with each other. We have all been there for each other for everything: celebrations and hardships and everything in between. We have such a good time with each other’s company but also with the food.

Usually, whoever is hosting makes the main dish and then everyone contributes the rest. I tend to bring dessert and it’s usually gluten free for a couple of ladies in the group. Our next meeting is tomorrow and in honor of these women, I baked two types of cookies: Coconut cookies (only three ingredients!) and a new mashup that I created, Rye and Almond-meal based chocolate chip cookies. Both turned out delicious! Be warned, the coconut cookies have a very strong coconut flavor as they are made with coconut flour – however, they are paleo friendly and low carb.

Rye/Almond Chocolate Chip Cookies 

IMG_1211

(Loosely Adapted from the King Arthur Flour Almond Chocolate Chip Cookies)

Makes 12-18 cookies depending on the size

Ingredients: 

1/4 cup sugar

1/4 teaspoon each of baking soda, baking powder and salt

2 tablespoons butter (room temperature)

1 egg

1 teaspoon vanilla

1 and 1/2 cups almond flour

1/2 cup rye flour

1/2 cup chocolate chips

Instructions: 

  1. Pre-heat over to 350 degrees.
  2. Mix sugar, butter, baking soda, baking powder and salt in a medium bowl with a wooden spoon.
  3. Mix in the vanilla and egg – beat for one minute until well-mixed.
  4. Add in the flours and chocolate chips.
  5. Use your hands to make the cookies – flatten them to about 1/4-3/8 of an inch thick.
  6. Place on a cookie sheet on parchment paper or a silpat mat and bake for 8-12 minutes until browned at the edges.
  7. Remove from oven and let cool for a few minutes before moving to a rack to cool.
  8. Enjoy warm or if you like crispier cookies, wait until they cool to room temperature.


3-ingredient Coconut Cookies IMG_1214

Note: The nerd in me loves the proportions of this cookie: 3-2-1

Makes 8 or so cookies

Ingredients:

3 Tablespoons coconut flour

2 Tablespoons butter, softened

1 Tablespoon honey

IMG_1210

Instructions: 

  1. Preheat oven to 350 degrees.
  2. Use a wooden spoon to mix ingredients in a small mixing bowl – stir until the dough comes together with all of the butter incorporated. Dough will be very sticky.
  3. Divide the dough into 8 small balls and place on the cookie sheet (again I use parchment or a silpat mat on top of the cookie sheet).
  4. Press the balls down slightly to flatten.
  5. Bake 8-10 minutes until the edges are slightly golden – watch them carefully as they can tend to brown quickly once the browning starts.
  6. Let cool on the sheet. They will harden at room temperature – however, when they come out of the oven, they are pretty soft.
  7. Enjoy!


img_1213.jpg

Thank you for visiting!

Love,

Pooja